
Your best work can get lost in a long PDF with no clear starting point. A portfolio flipbook gives clients and hiring teams a book they can open online, with your projects arranged in the order you want them seen.
A clear project order and a few useful captions help explain what you contributed. This guide shows how to choose projects, explain your contribution, and build a portfolio flipbook around an eight-page design example before sharing it with Recastia.
Key Takeaways
- Choose projects that match the work you want next, rather than including everything you’ve made.
- Give each project a clear brief, your role, a useful design decision, and finished work.
- Keep a consistent page size while letting each artwork retain its own proportions.
- Arrange the pages in your design file, then use Recastia to turn the PDF into a shareable flipbook.
Choose the Work You Want to Be Hired For
A portfolio flipbook is a digital portfolio presented as an online, page-turning book. It suits a selected body of visual work: brand identities, illustration, photography, interiors, or other projects you want someone to browse in sequence.
Start with the opportunity. If you’re approaching a cafe about its branding, lead with an identity project and its menu or packaging applications. A strong but unrelated illustration can wait until later, or stay out of that edition.
For each project, ask:
- Does it show a skill this client or role needs?
- Can I explain what I personally contributed?
- Does it add something the other projects don’t show?
- Do I have permission to share the work and supporting material?
Two nearly identical logo projects may tell less than one well-explained identity and a different project that shows your layout skills. Keep a master folder of your work, then make a shorter selection for each audience.
Give Each Project Enough Context
A finished image shows what you made. A short explanation tells someone why you made it that way. Adobe’s digital art portfolio guidance similarly recommends annotations that explain the brief, approach, and results.
Use these elements where they help the project:
- Brief: What needed to be designed, and for whom?
- Your role: Name the work you did, especially on a team project.
- Design decision: Show a sketch, comparison, or detail that explains a choice.
- Finished work: Include the final piece and the applications needed to understand it.
Keep the explanation close to the relevant image. Instead of “I created a modern, versatile identity,” describe the choice: “I simplified the cup mark so the name had more space on the takeaway card.”
For client work, add an outcome you can support, such as the final deliverables or a published application. For a personal concept, label it as self-initiated and explain what you designed. You don’t need a sales figure to make a design decision worth discussing.
Plan an Eight-Page Portfolio Flipbook
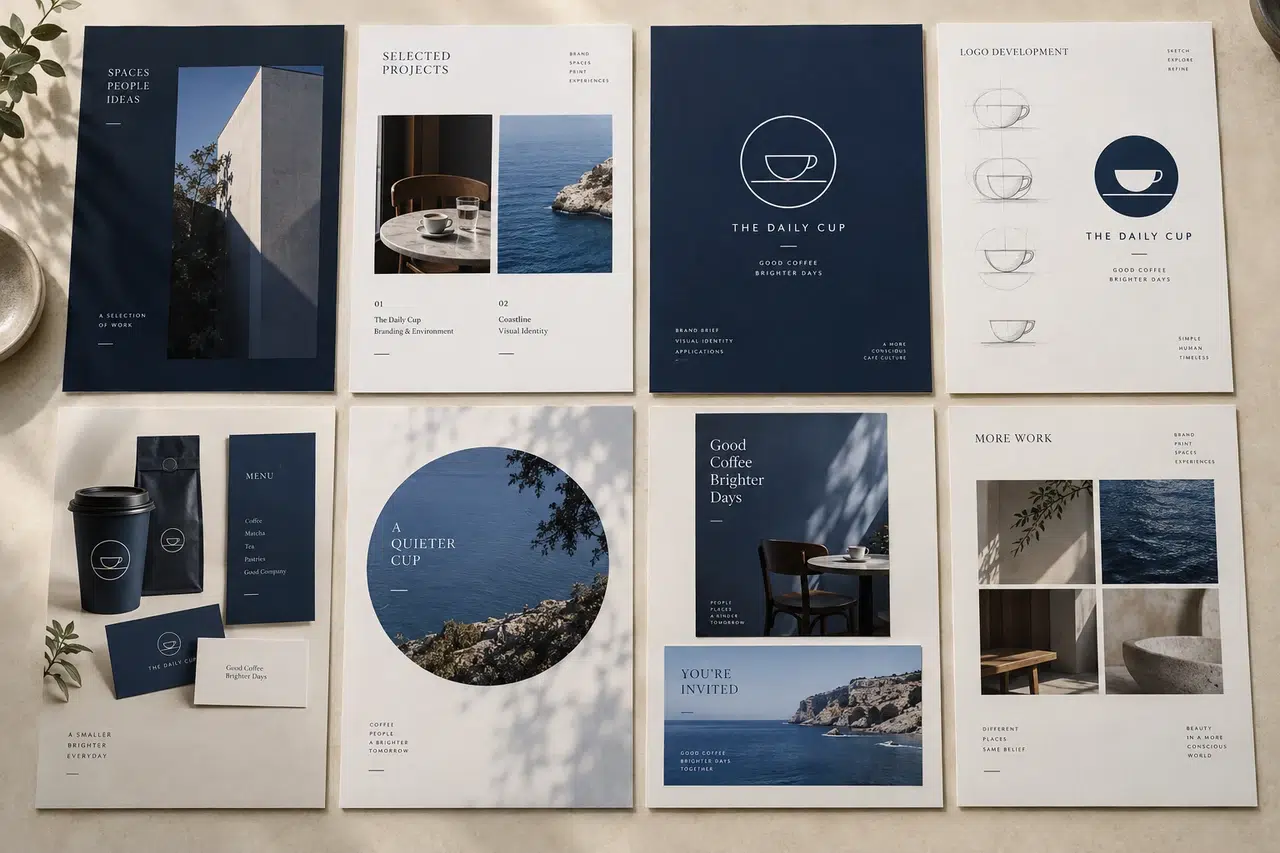
The sample portfolio PDF pairs two self-initiated projects: a cafe identity and an event poster. The cafe project shows a small branding system; the poster project shows how a composition changes between a tall poster and a wide invitation.
Use its page order as a starting point, then give your own projects the space they need:
- Page 1: Cover: A clear title and a preview of the work inside. Add your name and discipline to your own version.
- Page 2: Project index: Name each project, identify the type of work, and list its pages.
- Page 3: First project: Show the cafe identity with its brief and the designer’s contribution.
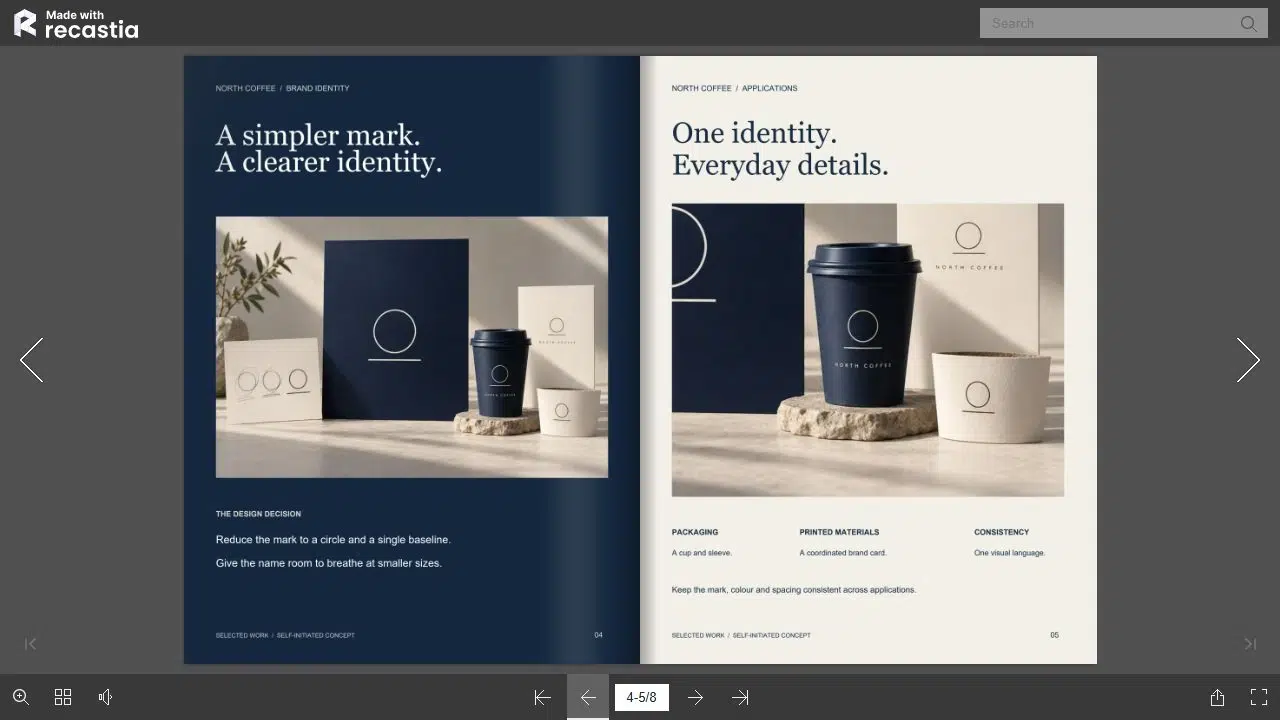
- Page 4: A design decision: Compare the early mark with the selected version and explain the simpler shape.
- Page 5: Final applications: Show the identity on a menu, cup sleeve graphic, and takeaway card.
- Page 6: Second project: Introduce the event poster, its brief, and the designer’s role.
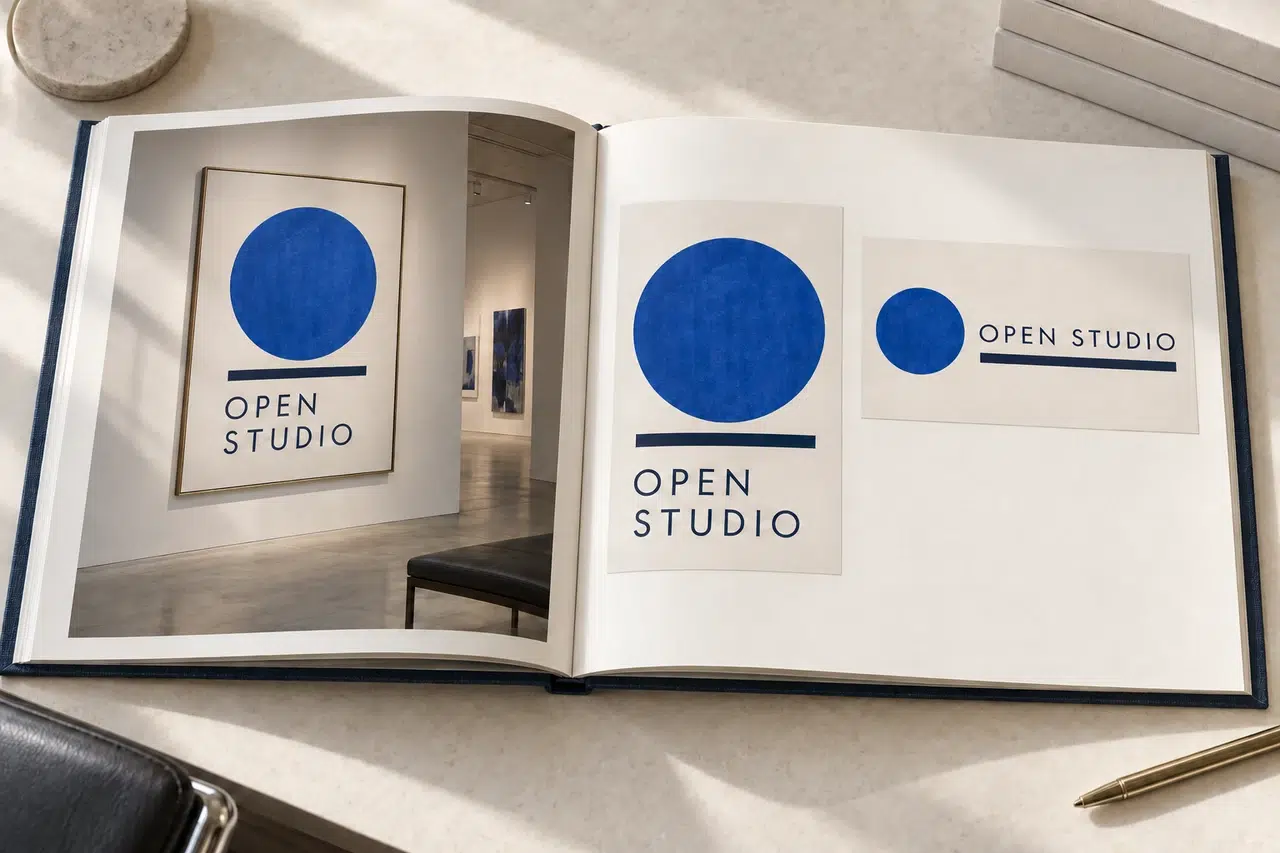
- Page 7: Format adaptation: Place the portrait poster and landscape invitation together to explain the layout changes.
- Page 8: Closing page: In your own portfolio, finish with a short introduction and a contact method. The sample uses an editorial note here.
Eight pages is an example, not a target. A complex project may need another page for a key decision. A simple poster may need only its finished image and a concise explanation. Remove pages that repeat what the viewer has already seen.
Show One Decision, Not Every Draft
In the North Coffee example, the useful story is the change from an overlapping-circle sketch to a simpler cup mark. The next page shows how that mark works across three layouts.
That sequence gives the process image a purpose. It explains a visible choice in the finished work, rather than adding a page of unused sketches just to prove there was a process.
For your own case study, choose a decision someone can understand by looking at the two images. It might be a clearer type hierarchy, a revised floor plan, a tighter photograph crop, or a simpler navigation layout.
A useful caption pattern: Describe the change, then its reason. For example: “I moved the event title beside the graphic on the wide invitation so both could stay large.”

Fit Different Artwork Into a Consistent Page Size
Keep the portfolio pages consistent even when the work varies. A tall poster and a wide invitation can sit on the same page without either being stretched or cut off.
The Open Studio example leaves space around both pieces. Each image keeps its proportions, with a short label underneath. The reader can compare the layouts without guessing which part belongs to which format.
When preparing your PDF:
- Show the whole piece first. Use a separate close-up when small details need attention.
- Leave room for captions. Don’t shrink the artwork and its explanation into an overcrowded collage.
- Keep key text away from the middle of a spread. A heading or caption should still make sense when one page is viewed on its own.
- Check at a realistic size. If a description needs constant zooming, shorten it or give it more space.
Build the page layouts in your design software and export the PDF in reading order. Recastia is the publishing step for those prepared pages.
Share Your Portfolio With Recastia
Once the pages are ready, use the Flipbook Maker to create an online version. Keep the PDF too, so you can supply a file when an application or client requests one.
Turn your prepared portfolio PDF into a flipbook, then choose how to share it.
- Upload and Review Your Portfolio
Upload the exported PDF to Flipbook Maker. Browse the book using the page controls or thumbnails, checking that the project order matches your index and the captions are easy to read. If a page needs a different layout, revise it in your design file before creating the version you’ll share.
- Copy the Link or Embed the Book
Open Share to access the flipbook link and its QR code. For a website, choose Embed to get the embed code; the Responsive option lets the book fit its container. Open the shared version on a phone as well as a larger screen before sending it to a client.
Give the link a descriptive label, such as “Brand Identity Portfolio,” rather than “Click here.” In an outreach message, point to the relevant project: “The North Coffee identity starts on page 3.” That makes the introduction specific without repeating the entire portfolio in your email.
For more on reader controls and website placement, see the guide to sharing and embedding a PDF flipbook.
Make Your Next Portfolio Easy to Review
Start your portfolio flipbook with the project most relevant to the work you want. Explain your contribution beside the images, include a decision that shows how you think, and finish with a clear way to contact you.
Once the PDF reads well from start to finish, create your portfolio flipbook and send the link with a short introduction to the project you want discussed first.
Bring Your PDF to Life With Recastia
Create, customize, and share your content in a more engaging way.
Frequently Asked Questions
Include a short introduction, but keep a full resume separate unless the application asks for it inside the portfolio. Use the portfolio pages for projects and your contribution to them. A separate resume gives employment dates, qualifications, and other background without interrupting the work.
Yes, if it shows relevant work and you label it as in progress. Explain what you have completed and what remains unresolved. Show enough finished material for someone to understand your contribution, and don’t present a proposed design as a launched product or completed client job.
Follow the client’s or application’s instructions. A flipbook link offers online reading, while a PDF supplies the file itself. Keep both available. If the instructions specify a PDF and a file-size limit, submit that format rather than substituting a link.
Review it before a new application or client pitch. Replace work that no longer fits, add stronger relevant projects, and check your contact details. Open the link you plan to send so you’re sharing the intended edition.